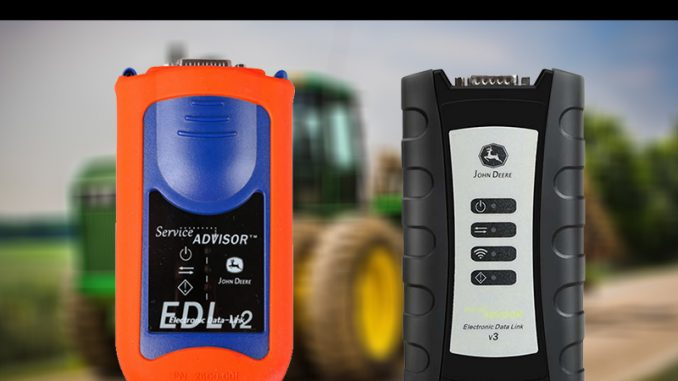
If you’re a John Deere equipment owner or a technician working in the agricultural or construction industry, you may have heard of the John Deere Service Advisor EDL V2/V3 tool. This diagnostic tool is essential for troubleshooting and maintaining John Deere machinery. In this blog post, we’ll explore how to effectively use the Service Advisor EDL V2/V3 tool, making it easier for you to diagnose issues and maintain your equipment.
What is the John Deere Service Advisor EDL V2/V3 Tool?
The John Deere Service Advisor EDL (Electronic Data Link) V2/V3 is a diagnostic tool that connects to John Deere equipment to provide detailed information about the machine’s performance and any potential issues. The tool allows technicians to read trouble codes, perform software updates, and access service manuals, making it an invaluable resource for maintenance and repairs.
Getting Started with the EDL Tool
Before using the EDL tool, it’s crucial to ensure that you have everything you need:
1. Compatible Laptop/PC: The EDL tool requires a compatible device with the Service Advisor software installed. Ensure you have the latest version for optimal performance.
2.EDL Tool: You should have the EDL V2 or V3 device, which connects your laptop to the equipment.
3. Cables: Make sure you have the necessary cables to connect the EDL tool to the diagnostic port on your John Deere equipment.
4. Power Source: Ensure your laptop is charged or connected to a power source, as the diagnostics can take some time.
Step-by-Step Guide to Using the EDL Tool
Step 1: Connect the EDL Tool
1. the Diagnostic Port: Find the diagnostic port on your John Deere machine. is usually located near the engine compartment or under the dashboard.
2. Connect the EDL Tool: Plug one end of the EDL tool into the diagnostic port and the other end into your laptop or PC.
Step 2: Launch the Service Advisor Software
1. Open the Software: On your laptop, launch the John Deere Service Advisor software.
2. Select Your Machine: Use the software interface to select the specific model of your John Deere equipment. This ensures that you access the correct information and diagnostics for your machine.
Step 3: Perform Diagnostics
1. Read Trouble Codes: Navigate to the diagnostics section of the software. Here, you can read any active or historical trouble codes stored in your machine’s ECU (Electronic Control Unit). Take note of these codes as they will guide your troubleshooting efforts.
2. View Live Data: The EDL tool allows you to view live data from various sensors in the machine. This data can help you understand how different systems are functioning in real-time.
3. Run Tests: The software may offer specific tests you can run to diagnose issues. Follow the prompts to perform these tests, and record any results or findings.
Step 4: Access Service Information
1. Service Manuals: The Service Advisor software provides access to service manuals and repair guides. Use these resources to understand how to address the issues identified during diagnostics.
2. Software Updates: If needed, you can also use the EDL tool to perform software updates on your equipment to ensure it operates with the latest features and fixes.
Step 5: Document Your Findings
1. Record Codes and Data: After completing your diagnostics, make sure to document all trouble codes, test results, and any other relevant data. This will be helpful for future reference or for communicating with other technicians.
2. Plan Repairs: Based on your findings, create a plan for any necessary repairs or maintenance.
Using the John Deere Service Advisor EDL V2/V3 tool can significantly enhance your ability to diagnose and maintain your equipment. By following the steps outlined in this blog post, can ensure that you are utilizing this powerful diagnostic tool to its full potential. Regular maintenance and timely repairs will not only extend the life of your machinery but also improve its overall performance.
